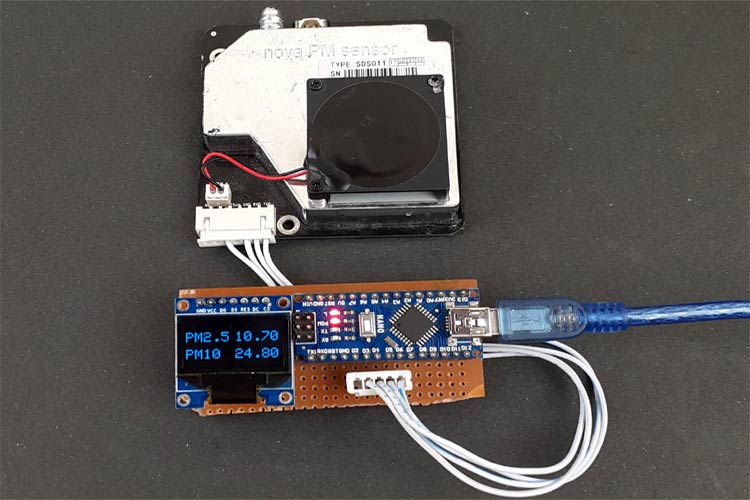
Air pollution is a major issue in many cities and the air quality index is getting worse every day. According to the World Health Organization report, more people are killed prematurely by the effects of hazardous particles presented in the air than from car accidents. According to the Environmental Protection Agency (EPA), indoor air can be 2 to 5 times more toxic than outdoor air. So here we build a device to monitor air quality by measuring PM2.5 and PM10 particles in the air.
We previously used the MQ135 Gas sensor for Air quality monitor and the Sharp GP2Y1014AU0F Sensor for measuring dust density in the air. This time we are using an SDS011 sensor with Arduino Nano to build Air quality Analyser. SDS011 sensor can calculate the concentrations of PM2.5 and PM10 particles in the air. Here the real-time PM2.5 and PM 10 values will be displayed on the OLED display.
Components Required
- Arduino Nano
- Nova PM Sensor SDS011
- 0.96’ SPI OLED Display Module
- Jumper Wires
Nova PM Sensor SDS011
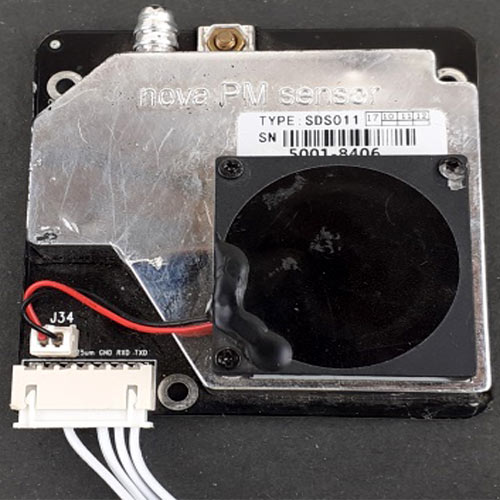
The SDS011 Sensor is a very recent Air Quality Sensor developed by Nova Fitness. It works on the principle of laser scattering and can get the particle concentration between 0.3 to 10μm in the air. This sensor consists of a small fan, air inlet valve, Laser diode, and photodiode. The air enters through the air inlet where a light source (Laser) illuminates the particles and the scattered light is transformed into a signal by a photodetector. These signals are then amplified and processed to get the particle concentration of PM2.5 and PM10.
SDS011 Sensor Specifications:
- Output: PM2.5, PM10
- Measuring Range: 0.0-999.9μg/m3
- Input Voltage: 4.7V to 5.3V
- Maximum Current: 100mA
- Sleep Current:2mA
- Response Time: 1 second
- Serial Data Output Frequency: 1 time/second
- Particle Diameter Resolution: ≤ 0.3μm
- Relative Error:10%
- Temperature Range: -20~50°C
0.96’ OLED Display Module
OLED (Organic Light-Emitting Diodes) is a self light-emitting technology, constructed by placing a series of organic thin films between two conductors. A bright light is produced when an electric current is applied to these films. OLEDs are using the same technology as televisions, but have fewer pixels than in most of our TVs.
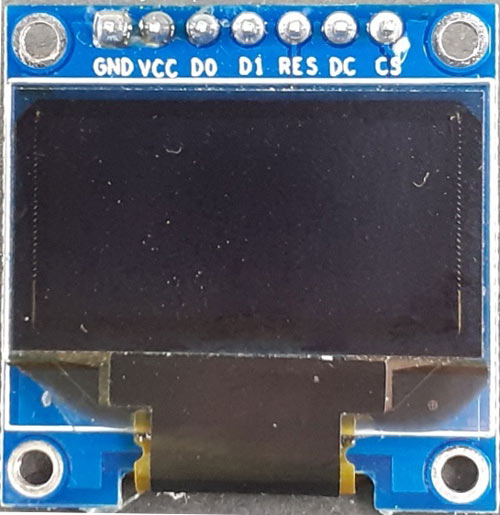
For this project, we are using a Monochrome 7-pin SSD1306 0.96” OLED display. It can work on three different communications Protocols: SPI 3 Wire mode, SPI four-wire mode, and I2C mode. The pins and its functions are explained in the table below:
|
Pin Name |
Other Names |
Description |
|
Gnd |
Ground |
Ground pin of the module |
|
Vdd |
Vcc, 5V |
Power pin (3-5V tolerable) |
|
SCK |
D0,SCL,CLK |
Acts as the clock pin. Used for both I2C and SPI |
|
SDA |
D1,MOSI |
Data pin of the module. Used for both IIC and SPI |
|
RES |
RST, RESET |
Resets the module (useful during SPI) |
|
DC |
A0 |
Data Command pin. Used for SPI protocol |
|
CS |
Chip Select |
Useful when more than one module is used under SPI protocol |
We have covered a full Article on OLED displays and its types here.
OLED Specifications:
- OLED Driver IC: SSD1306
- Resolution: 128 x 64
- Visual Angle: >160°
- Input Voltage: 3.3V ~ 6V
- Pixel Colour: Blue
- Working temperature: -30°C ~ 70°C
Learn more about OLED and its interfacing with different microcontrollers by following the link.
Circuit Diagram for Air Quality Analyzer
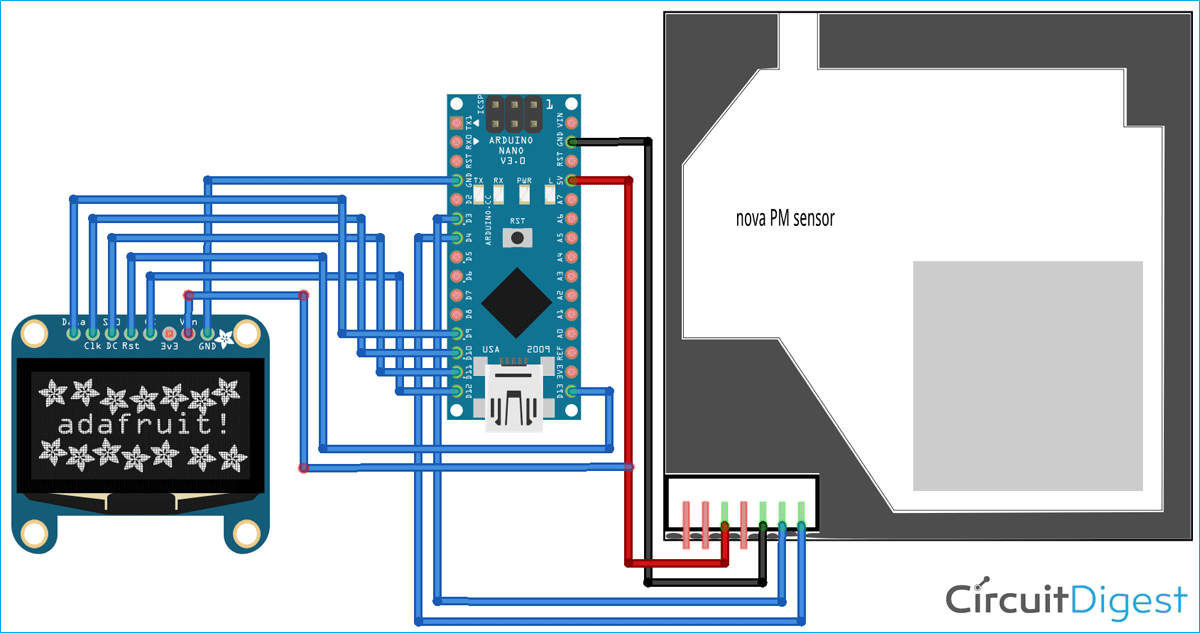
The circuit diagram for measuring PM2.5 and PM10 particles using Arduino is very simple and given below.
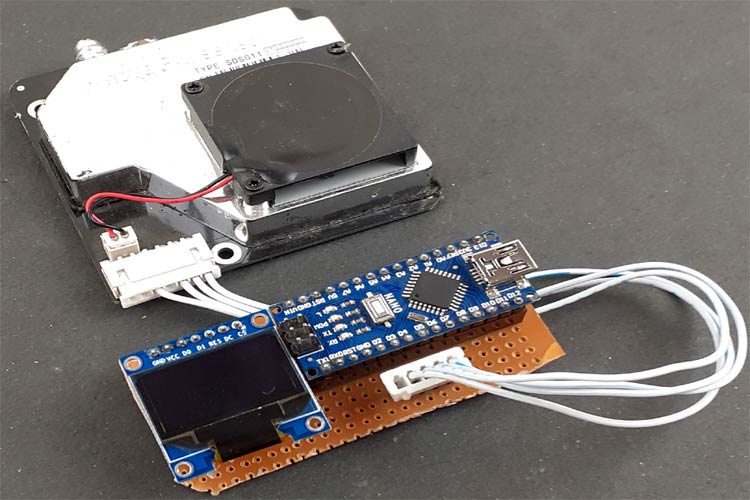
SDS011 Sensor and OLED Display module both are powered with +5V and GND. The transmitter and Receiver pins of SDS011 are connected to D3 and D4 pins of Arduino Nano. Since the OLED Display module uses SPI communication, we have established an SPI communication between the OLED module and Arduino Nano. The connections are shown in the below table:
|
S.No |
OLED Module Pin |
Arduino Pin |
|
1 |
GND |
Ground |
|
2 |
VCC |
5V |
|
3 |
D0 |
10 |
|
4 |
D1 |
9 |
|
5 |
RES |
13 |
|
6 |
DC |
11 |
|
7 |
CS |
12 |
Building the Circuit on Perf Board
I have also soldered all the components on the perf board to make it look neat. But you can also make them on a breadboard. The boards that I made are below. While soldering, make sure you don’t sort the wires. The perf board that I soldered is shown below:

Code Explanation for Air Quality Monitor
The complete code for this project is given at the end of the document. Here we are explaining some important parts of the code.
The code uses the SDS011, Adafruit_GFX, and Adafruit_SSD1306 libraries. These libraries can be downloaded from the Library Manager in the Arduino IDE and can be installed from there. For that, open the Arduino IDE and go to Sketch > Include Library > Manage Libraries. Now search for SDS011 and install the SDS Sensor library by R. Zschiegner.

Similarly, install the Adafruit GFX and Adafruit SSD1306 libraries by Adafruit.
After installing the libraries to Arduino IDE, start the code by including the needed library files.
#include <SDS011.h>
#include <SPI.h>
#include <Adafruit_GFX.h>
#include <Adafruit_SSD1306.h>
In the next lines, define two variables to store the PM10 and PM2.5 values.
float p10,p25;
Then, define the OLED width and height. In this project, we’re using a 128×64 SPI OLED display. You can change that SCREEN_WIDTH and SCREEN_HEIGHT variables according to your display.
#define SCREEN_WIDTH 128
#define SCREEN_HEIGHT 64
Then define the SPI communication pins where OLED Display is connected.
#define OLED_MOSI   9
#define OLED_CLK   10
#define OLED_DC    11
#define OLED_CS    12
#define OLED_RESET 13
Then, create an Adafruit display instance with the width and height defined earlier with the SPI communication protocol.
Adafruit_SSD1306 display(SCREEN_WIDTH, SCREEN_HEIGHT, OLED_MOSI, OLED_CLK, OLED_DC, OLED_RESET, OLED_CS);
Now inside the setup() function, initialize the Serial Monitor at a baud rate of 9600 for debugging purposes. Also, Initialize the OLED display and SDS011 sensor with the begin() function.
my_sds.begin(3,4);
Serial.begin(9600);
display.begin(SSD1306_SWITCHCAPVCC);
Inside the void loop(), read the PM10 and PM2.5 values from the SDS011 sensor and print the readings on a serial monitor.
void loop() {
  error = my_sds.read(&p25,&p10);
  if (! error) {
    Serial.println("P2.5: "+String(p25));
    Serial.println("P10:  "+String(p10));
After that, set the text size and text colour using the setTextSize() and setTextColor().
display.setTextSize(2);
display.setTextColor(WHITE);
Then in the next line, define the position to start the text using the setCursor(x,y) method. Here we will display the PM2.5 and PM10 values on OLED display so the first line starts at (0,15) while the second line starts at (0, 40) coordinates.
display.setCursor(0,15);
display.println("PM2.5");
display.setCursor(67,15);
display.println(p25);
display.setCursor(0,40);
display.println("PM10");
display.setCursor(67,40);
display.println(p10);
And finally, call the display() method to display the text on OLED Display.
display.display();
display.clearDisplay();
Arduino Air Quality Monitor Testing
Once the hardware and code are ready, it is time to test the device. For that, connect the Arduino to the laptop, select the Board and Port, and hit the upload button. As you can see in the below image, it will display PM2.5 and PM10 values on OLED Display.
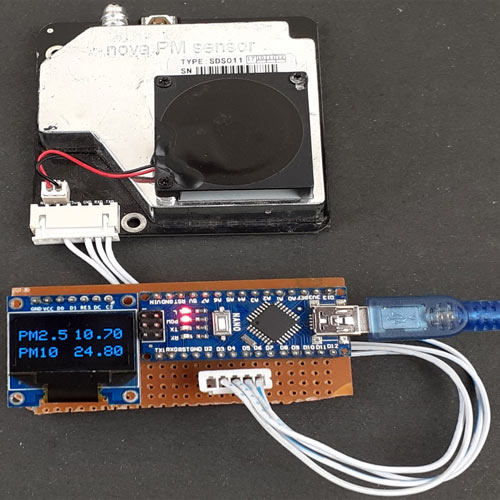
The complete working video and code are given below. Hope you enjoyed the tutorial and learned something useful. If you have any questions, leave them in the comment section or use our forums for other technical queries.
Complete Project Code
#include <SDS011.h>
#include <SPI.h>
#include <Adafruit_GFX.h>
#include <Adafruit_SSD1306.h>
float p10,p25;
int error;
SDS011 my_sds;
#define SCREEN_WIDTH 128 // OLED display width, in pixels
#define SCREEN_HEIGHT 64 // OLED display height, in pixels
// Declaration for SSD1306 display connected using software SPI (default case):
#define OLED_MOSI   9
#define OLED_CLK   10
#define OLED_DC    11
#define OLED_CS    12
#define OLED_RESET 13
Adafruit_SSD1306 display(SCREEN_WIDTH, SCREEN_HEIGHT,
  OLED_MOSI, OLED_CLK, OLED_DC, OLED_RESET, OLED_CS);
void setup() {
  my_sds.begin(3,4);
  Serial.begin(9600);
  display.begin(SSD1306_SWITCHCAPVCC);
  display.clearDisplay();
  display.display();
}
void loop() {
  error = my_sds.read(&p25,&p10);
  if (! error) {
    Serial.println("P2.5: "+String(p25));
    Serial.println("P10:  "+String(p10));
    display.setTextSize(2);
    display.setTextColor(WHITE);
    display.setCursor(0,15);
    display.println("PM2.5");
    display.setCursor(67,15);
    display.println(p25);
    display.setCursor(0,40);
    display.println("PM10");
    display.setCursor(67,40);
    display.println(p10);
    display.display();
    display.clearDisplay();
  }
  delay(100);
}Comments
HI,
HI,
this is my first project, and first go at coding, i followed the tutorial Air Quality Analyzer using Arduino and Nova PM Sensor SDS011 to Measure PM2.5 and PM10
but then learned i have a different OLED to the tutorial, mine is connected to I2c.
so basically, i confirmed my sensor works on my pc, and the Arduino nano works. it shows the text, but the it reads zero. im sure it will be a simple fix for you guys, but ive tried to figure it out and its taken me 2 days.
here is the code:
#include <SDS011.h>
#include <SPI.h>
#include <Wire.h>
#include <Adafruit_GFX.h>
#include <Adafruit_SSD1306.h>
float p10,p25;
int error;
SDS011 my_sds;
#define SCREEN_WIDTH 128
#define SCREEN_HEIGHT 64
#define I2C_SDA  4
#define I2C_SCL  5
#define SDS011 my_sds;
Adafruit_SSD1306 display(SCREEN_WIDTH, SCREEN_HEIGHT, &Wire, -1);

void setup() {
  my_sds.begin(3,4);
  Serial.begin(9600);

  if(!display.begin(SSD1306_SWITCHCAPVCC, 0x3C)) {
    Serial.println(F("SSD1306 allocation failed"));
    for(;;);
  }

}
void loop() {
      error; my_sds.read(&p25,&p10);
  if (! error) {
    Serial.println("P2.5: "+String(p25));
    Serial.println("P10:  "+String(p10));
display.setTextSize(2);
display.setTextColor(WHITE);
display.setCursor(0,15);
display.println("PM2.5");
display.setCursor(67,15);
display.println(p25);
display.setCursor(0,40);
display.println("PM10");
display.setCursor(67,40);
display.println(p10);
display.display();
display.clearDisplay();
}
delay(1000);
}
the serial monitor, does update, and i can see activity on the Arduino, the sensor is powered, fan operates. also the circuit is connected same as the tutorial, except the modification to the OLED.
IS youe code showing any
IS youe code showing any error ? please share your arduino IDE photo after uploading the code.
I wish to use an Arduino Uno
I wish to use an Arduino Uno R3 board available with me . I will keep all Digital Pins same and use the same code. Any problem anticipated ? Thanks
You can use it directly
You can use it directly without making any changes.
I used Uno board instead of
I used Uno board instead of Nano. The code works fine and the system is working.
Is it possible to add a warning LED output if the pollution level exceeds a certain value?
I understand that the code and the circuit will have to be modified. Anybody can help?
Yes, just connect an led to
Yes, just connect an led to one of the digital pins of arduino, initialize that pin in code and use a if condition to change the led state whenver the values change
@ashish Choudhary: I have no
@ashish Choudhary: I have no experience in writing codes, just learning. Appreciate if you can modify the full code/let me know where to insert what code, that will really be helpful.
Meanwhile, I was also trying to take out PWM output from Pin2 of SDSO11 sensor, convert this to a varying dc voltage through a low pass filter and an op Amp, compare this with a dc reference voltage and switch a comparator ckt. Found dc voltage varies from 1.33V [ 100-125 ug/cum] to 2.6V [ > 500 ug/cum]. But PWM signal being 1HZ , output dc is a bit unstable.
your coding solution may be more accurate and easy . Thanks and looking for your support.



My Oled screen(s) is/are not working when I coppy/paste the code and follow the steps in this instruction. I did mention that the SPI.h is red when I upload the code. But it uploads with succes. Could there be something wrong with my settings?