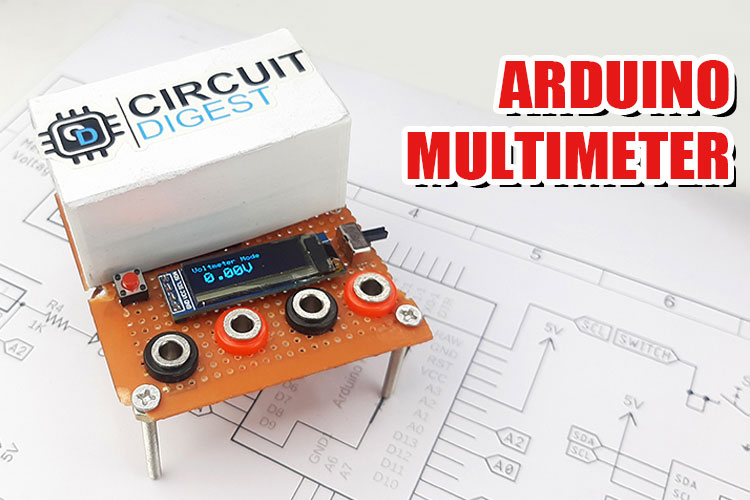
A multimeter is a must-have tool in your arsenal when it comes to creating or developing electrical circuits. Without it, executing a job will be extremely tough. So, in this post, we chose to create a low-cost digital multimeter using Arduino and other basic components. When it comes to the multimeter's functions, it can measure voltage up to 24V, as well as diode, resistance, and voltage drop across an LED. It also includes a continuity feature with a buzzer, so you can use it to identify short circuits. Previously we have built many projects in the field of measuring instruments like,
- IoT Based Electricity Energy Meter using ESP12 and Arduino
- Measuring water Flow Rate and Volume using Arduino and Flow Sensor
- DIY GPS Speedometer using Arduino and OLED
- Speed, Distance and Angle Measurement for Mobile Robots
You can check the above projects if you are interested in the topics.
Components Required to Build Digital Meter
Components required to build a digital meter are simple and can be easily found in your local store; the complete list of components is given below.
- Arduino Pro Micro - 1
- Push Button - 1
- 1K Resistor - 1
- 10K Resistor - 1
- 4.7K Resistor - 2
- Active Buzzer - 1
- 0.91” 128x32 OLED - 1
- Toggle Switch - 1
- Banana Socket - 4
- 3.7V, 300mA lithium Battery - 2
- AMS1117-5.0 - 1
- Perf Board - 1
- Connecting Wires - 1
Circuit Diagram of Arduino Digital Multimeter
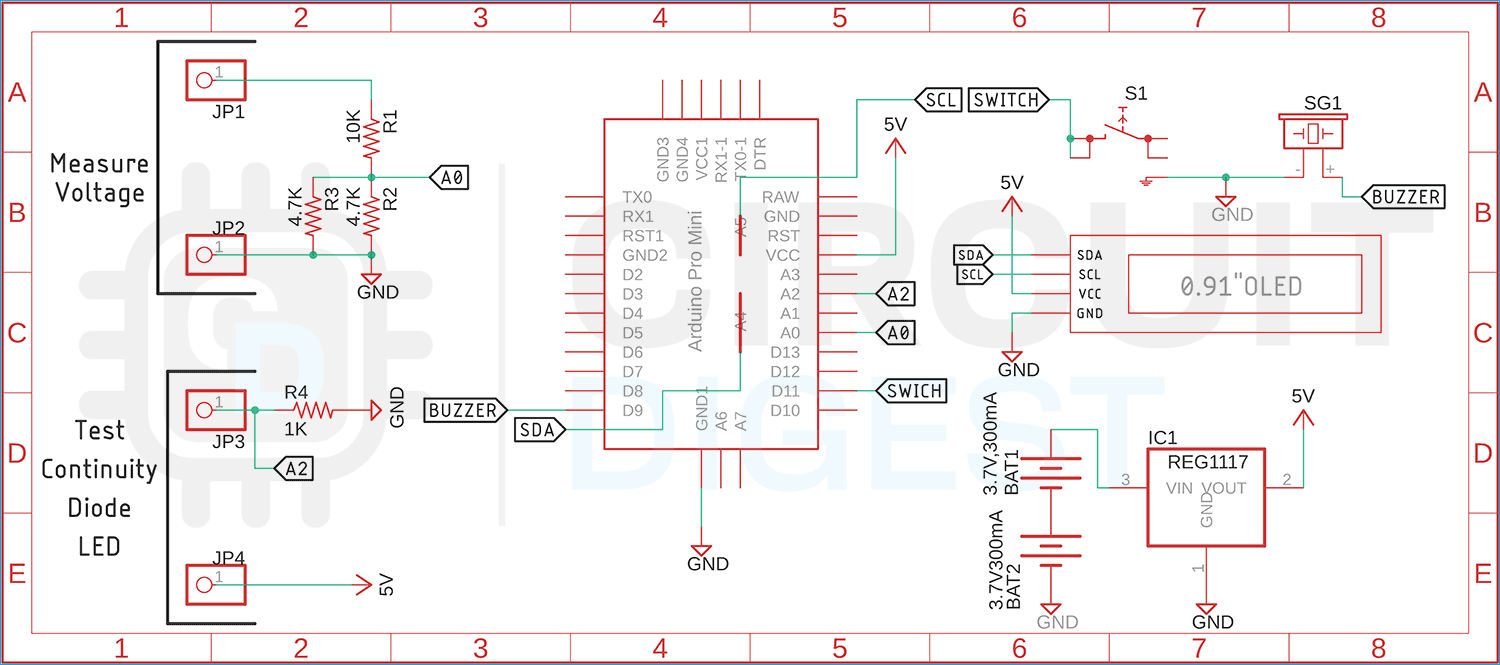
The complete schematic diagram of the Arduino Digital Multimeter is shown below. The schematic is simple and easy to understand.
The working of the schematic is simple: we have Arduino working as the brains of our project. In the circuit we have used two pairs of banana connectors for connecting external input. As you can see in the above diagram, we have a 10K resistor and two 4.7K resistors in parallel to form a voltage divider. With this voltage divider configuration and Arduino, we can measure input voltage max 24V. Please note that input voltage more than 24V can damage the device. Next, we have another pair of banana sockets that are for testing continuity Diode and LED, these tests are done by measuring a certain voltage drop across the test device. We also have connected a 0.91” OLED display to display all the data processed by the Arduino and we have a push button switch for toggle between all features of this multimeter. Finally, we have two 3.7V battery packs in series and an AMS1117-5.0 5V regulator to power the total circuit.
We previously used Arduino to build many test and measure instruments:
- Frequency Counter using Arduino
- Arduino Ohm Meter
- Capacitance Meter using Arduino
- LC Meter using Arduino: Measuring Inductance and Frequency
- Measure Sound/Noise Level in dB with Microphone and Arduino
Find all the test and measurement related projects here.
Arduino Code for Digital Multimeter
Arduino code for digital multimeter is very simple and easy to understand, the complete code for Arduino based digital multimeter is shown below.
We start our code by including all the required libraries, for that we need to include SPI.h, Wire.h, Adafruit_GFX.h, Adafruit_SSD1306.h to control the OLED display.
#include <SPI.h>
#include <Wire.h>
#include <Adafruit_GFX.h>
#include <Adafruit_SSD1306.h>
Next, we have defined the screen_height and screen_width of the display, next we have defined the screen address of the OLED Display.
#define SCREEN_WIDTH 128 // OLED display width, in pixels
#define SCREEN_HEIGHT 32 // OLED display height, in pixels
#define OLED_RESET     -1 // Reset pin # (or -1 if sharing Arduino reset pin)
#define SCREEN_ADDRESS 0x3C ///< See datasheet for Address; 0x3D for 128x64, 0x3C for 128x32
Finally, we have created an instance of the Adafruit_SSD1306 library named display.
Adafruit_SSD1306 display(SCREEN_WIDTH, SCREEN_HEIGHT, &Wire, OLED_RESET);
Next, we initialized all the required variables that are required by the code.
int analogInput = 0;
float vout = 0.0;
float vin = 0.0;
float R1 = 10000.0; // resistance of R1 (100K) -see text!
float R2 = 2200.0; // resistance of R2 (2.2K) - see text!
int value = 0;
int mode = 0;
int interval = 300;
unsigned long previousMillis = 0;
int raw = 0;
int Vin = 5;
float Vout = 0;
float R11 = 1000;
float R22 = 0;
float buffer = 0;
Next, we have our setup function, in the setup function we have first initialize the serial and we have made the ADC pins and switch pin as input and we have made other pins as output.
  Serial.begin(9600);
  pinMode(analogInput, INPUT);
  pinMode(9, OUTPUT);
  pinMode(7, INPUT_PULLUP);
  digitalWrite(9, HIGH);
  delay(40);
  digitalWrite(9, LOW);
  pinMode(13, OUTPUT);
Next, we have used the begin() methode of the display instance to initialize the display.
if (!display.begin(SSD1306_SWITCHCAPVCC, SCREEN_ADDRESS)) {
    Serial.println(F("SSD1306 allocation failed"));
    for (;;); // Don't proceed, loop forever
  }
}
Next, we have our void loop() function inside the loop function we have four modes, the modes can be changed by the mode switch mode0 is the voltage measurement function, mode1 is for diode test mode, mode2 is for OHM meter mode, finally we have continuity test mode. We will explain all the modes in this section.
In mode0 we read the analog pin A0 and store the value in the value variable. Now we store the value in the value variable. Now we calculate the measured value and store it in the vin variable. Now we display the data on the OLED display.
if (mode == 0) {
      // Measure Voltage
      value = analogRead(A0);
      vout = (value * 5.0) / 1024.0;
      vin = vout / (R2 / (R1 + R2));
      if (vin < 0.09) {
        vin = 0.0; //statement to quash undesired reading !
      }
      display.clearDisplay();
      display.setTextSize(1);
      display.setTextColor(SSD1306_WHITE);
      display.setCursor(0, 0);
      display.println("Voltmeter Mode");
      display.setTextSize(2);
      display.setCursor(10, 12);
      display.print((vin));
      display.print("V");
      display.display();
    }
Next, we have mode1 and mode 1 we have to read pin A2 and calculate the voltage drop across the resistor and diode. Please refer to the schematic if you are having a hard time understanding the part.
if (mode == 1) {
      // Diode Test
      value = analogRead(A2);
      vout = (value * 5.0) / 1024.0; // see text
      vout = 5 - vout;
      display.clearDisplay();
      display.setTextSize(1);
      display.setTextColor(SSD1306_WHITE);
      display.setCursor(0, 0);
      display.println("Diode/LED Test");
      display.setTextSize(2);
      display.setCursor(10, 12);
      display.print((vout));
      display.print(" V");
      display.display();
    }
Next, we have our mode2. mode2 is the OHM meter mode. In this mode we read the ADC data from A2 pin of the Arduino and we have calculated the resistor value using the following code.
 if (mode == 2) {
      // OHM Meter
      raw = analogRead(A2);
      buffer = raw * Vin;
      Vout = (buffer) / 1024.0;
      buffer = (Vin / Vout) - 1;
      R22 = R11 * buffer;
      Serial.print(Vout);
      Serial.print("R2: ");
      Serial.println(R22);
      display.clearDisplay();
      display.setTextSize(1);
      display.setTextColor(SSD1306_WHITE);
      display.setCursor(0, 0);
      display.println("OHM Meter Mode");
      display.setTextSize(2);
      display.setCursor(2, 12);
      if (R22 < 1000) {
        display.setCursor(2, 12);
        display.print((R22));
        display.print(" OHM");
      }
      else {
        display.setCursor(10, 12);
        display.print((R22 / 1000));
        display.print(" K");
      }
      display.display();
      //delay(300);
    }
Finally, we have mode3. In mode3 we check the continuity function of the digital multimeter. In this condition we check the resistance value and if the value is less than 100 we sound the buzzer.
  if (mode == 3) {
      // Continuity Test Mode
      raw = analogRead(A2);
      buffer = raw * Vin;
      Vout = (buffer) / 1024.0;
      buffer = (Vin / Vout) - 1;
      R22 = R11 * buffer;
      Serial.print(Vout);
      Serial.print("R2: ");
      Serial.println(R22);
      display.clearDisplay();
      display.setTextSize(1);
      display.setTextColor(SSD1306_WHITE);
      display.setCursor(0, 0);
      display.println("continuity Test Mode");
      display.setTextSize(2);
      display.setCursor(2, 12);
      display.print((R22));
      display.print(" OHM");
      display.display();
      if (R22 < 100) {
        digitalWrite(9, HIGH);
      }
      else {
        digitalWrite(9, LOW);
      }
    }
    previousMillis = currentMillis;
  }
Finally, we have another if condition, in this if condition we have checked the button status if the button status is low we increment the mode counter.
 if (digitalRead(7) == LOW) {
    delay(150);
    mode++;
    if (mode >= 4)
      mode = 0;
    Serial.println(mode);
  }
This marks the end of the code portion for the digital multimeter.
Designing a Cover for Multimeter with Fusion360
Once the circuit was completed, we decided to build a cover for the multimeter to hide the batteries and to make it look a little neat. The encloser looks like the image shown below
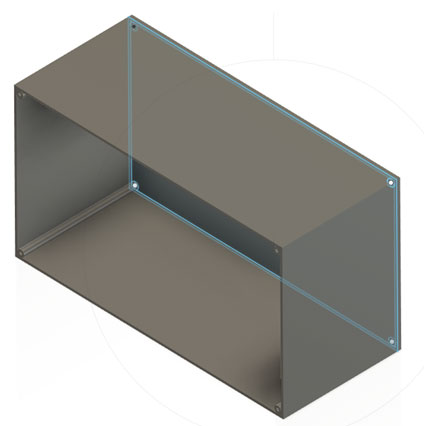
You can download the STL File for this enclosure by clicking on the link. Once the print was done it looks like the image shown below.

Testing the Digital Meter with Arduino
Once the build process was completed we started the testing overall features of this project and the results we got are shown below
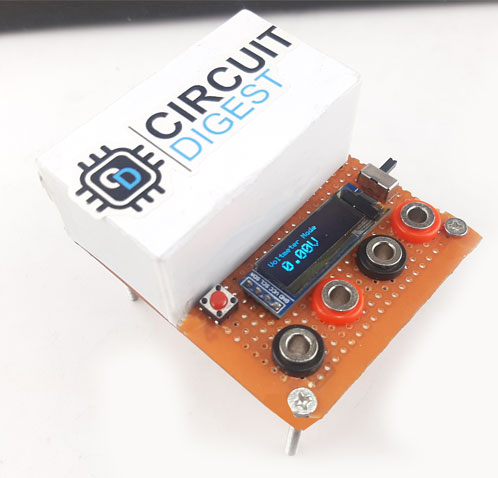
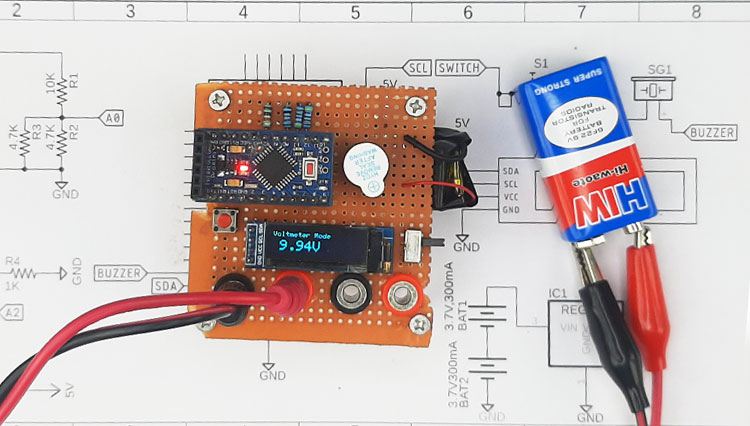
We started our testing process by testing voltage with the voltmeter and found out it needs a little bit of calibration, because in the voltage measurement mode it was showing 200mV difference when we compared it to a conventional multimeter.
Next we have diode/LED Test Mode, in this mode you can check the voltage drop across diode or LED.
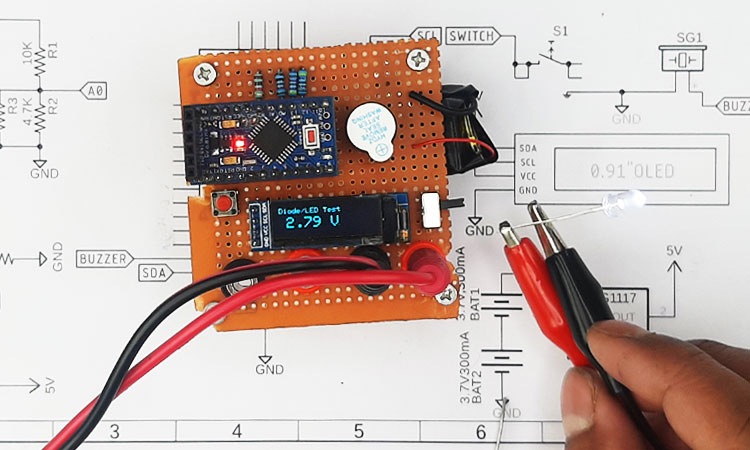
In the above image, you can see that we have connected a white LED and you can see the forward voltage drop across the LED.
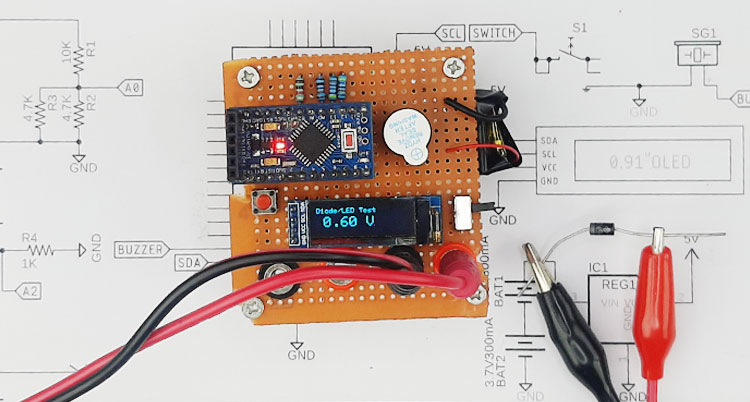
Next we have Diode Test Mode connected to a diode and as you can see the meter is showing the forward voltage drop across the diode. The diode under test is a schotty diode so the 0.6V drop is very accurate.
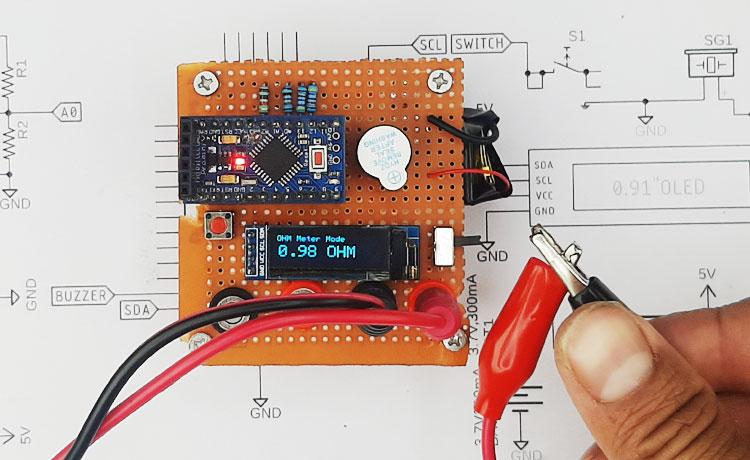
Finally, we have continuity test mode. In this mode as you can see we have shorted the two alligator clips and the multimeter shows the resistor value of the wire, and the buzzer is also making sound.
These are all the features that this multimeter has to offer, but there is a lot of room for improvements. By using an additional IC, we can reduce the banana sockets to only a single pair. We can replace the Arduino with an ESP to add additional wireless capabilities. also the circuit can be made in a PCB for better mechanical stability.
This is the end of this project and if you have any questions regarding this article, you can comment down below or you can ask in our forum.
Complete Project Code
#include <SPI.h>
#include <Wire.h>
#include <Adafruit_GFX.h>
#include <Adafruit_SSD1306.h>
#define SCREEN_WIDTH 128 // OLED display width, in pixels
#define SCREEN_HEIGHT 32 // OLED display height, in pixels
#define OLED_RESET     -1 // Reset pin # (or -1 if sharing Arduino reset pin)
#define SCREEN_ADDRESS 0x3C ///< See datasheet for Address; 0x3D for 128x64, 0x3C for 128x32
Adafruit_SSD1306 display(SCREEN_WIDTH, SCREEN_HEIGHT, &Wire, OLED_RESET);
int analogInput = 0;
float vout = 0.0;
float vin = 0.0;
float R1 = 10000.0; // resistance of R1 (100K) -see text!
float R2 = 2200.0; // resistance of R2 (2.2K) - see text!
int value = 0;
int mode = 0;
int interval = 300;
// Tracks the time since last event fired
unsigned long previousMillis = 0;
int analogPin = 0;
int raw = 0;
int Vin = 5;
float Vout = 0;
float R11 = 1000;
float R22 = 0;
float buffer = 0;
void setup() {
  Serial.begin(9600);
  pinMode(analogInput, INPUT);
  pinMode(9, OUTPUT);
  pinMode(7, INPUT_PULLUP);
  digitalWrite(9, HIGH);
  delay(40);
  digitalWrite(9, LOW);
  pinMode(13, OUTPUT);
  if (!display.begin(SSD1306_SWITCHCAPVCC, SCREEN_ADDRESS)) {
    Serial.println(F("SSD1306 allocation failed"));
    for (;;); // Don't proceed, loop forever
  }
}
void update_display(String val)
{
}
void loop()
{
  unsigned long currentMillis = millis();
  if ((unsigned long)(currentMillis - previousMillis) >= interval) {
    if (mode == 0)
    {
      value = analogRead(A0);
      vout = (value * 5.0) / 1024.0; // see text
      vin = vout / (R2 / (R1 + R2));
      if (vin < 0.09) {
        vin = 0.0; //statement to quash undesired reading !
      }
      display.clearDisplay();
      display.setTextSize(1);
      display.setTextColor(SSD1306_WHITE);
      display.setCursor(0, 0);
      display.println("Voltmeter Mode");
      display.setTextSize(2);
      display.setCursor(10, 12);
      display.print((vin));
      display.print("V");
      display.display();
    }
    if (mode == 1)
    {
      value = analogRead(A2);
      vout = (value * 5.0) / 1024.0; // see text
      vout = 5 - vout;
      display.clearDisplay();
      display.setTextSize(1);
      display.setTextColor(SSD1306_WHITE);
      display.setCursor(0, 0);
      display.println("Diode/LED Test");
      display.setTextSize(2);
      display.setCursor(10, 12);
      display.print((vout));
      display.print(" V");
      display.display();
    }
    if (mode == 2)
    {
      raw = analogRead(A2);
      buffer = raw * Vin;
      Vout = (buffer) / 1024.0;
      buffer = (Vin / Vout) - 1;
      R22 = R11 * buffer;
      Serial.print(Vout);
      Serial.print("R2: ");
      Serial.println(R22);
      display.clearDisplay();
      display.setTextSize(1);
      display.setTextColor(SSD1306_WHITE);
      display.setCursor(0, 0);
      display.println("OHM Meter Mode");
      display.setTextSize(2);
      display.setCursor(2, 12);
      if (R22 < 1000)
      {
        display.setCursor(2, 12);
        display.print((R22));
        display.print(" OHM");
      }
      else
      {
        display.setCursor(10, 12);
        display.print((R22 / 1000));
        display.print(" K");
      }
      display.display();
      //delay(300);
    }
    if (mode == 3)
    {
      raw = analogRead(A2);
      buffer = raw * Vin;
      Vout = (buffer) / 1024.0;
      buffer = (Vin / Vout) - 1;
      R22 = R11 * buffer;
      Serial.print(Vout);
      Serial.print("R2: ");
      Serial.println(R22);
      display.clearDisplay();
      display.setTextSize(1);
      display.setTextColor(SSD1306_WHITE);
      display.setCursor(0, 0);
      display.println("continuity Test Mode");
      display.setTextSize(2);
      display.setCursor(2, 12);
      display.print((R22));
      display.print(" OHM");
      display.display();
      if(R22 < 100)
      {
        digitalWrite(9, HIGH);
      }
      else
      {
        digitalWrite(9, LOW);
      }
    }
    previousMillis = currentMillis;
  }
  // Use the snapshot to set track time until next event
  //previousMillis = currentMillis;
  if (digitalRead(7) == LOW)
  {
    delay(150);
    mode++;
    if (mode >= 4)
      mode = 0;
    Serial.println(mode);
  }
}
