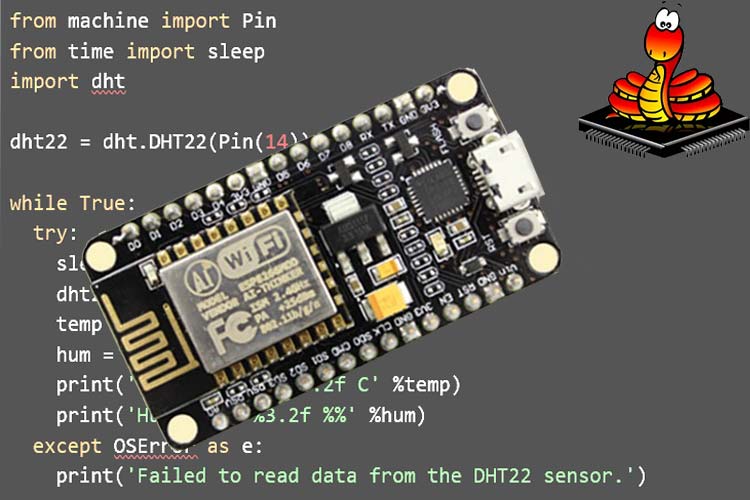
For a beginner who is interested in programming Wi-Fi enabled microcontrollers like the ESP8266, understanding the ESP-IDF programming environment or the Arduino IDE can be a daunting task, the cryptic syntax of C and C++ languages requires more knowledge of computer science which is why those languages are not always friendly for beginners, so in this article, we will learn to set up and program an ESP8266 with MicroPython, and finally, we will get the temperature and humidity data from our favorite DHT22 temperature and humidity sensor. Previously we have also made a tutorial on how to program ESP32 with Micro Python, you can also check that out if interested.
What is MicroPython?
We can say MicroPython is a diced-up version of python, designed to work with microcontrollers and embedded systems. The syntax and coding process of MicroPython resembles python. So, if you already know python, you already know how to write your code using MicroPython. If you are a Python fan you can check this article.
MicroPython was developed in the UK, by a team lead by Damion jones, and they launched a Kickstarter while back, where they launched a particular set of development boards that would be running firmware, which allows you to run MicroPython on top of it, that firmware has now been ported out to run on the ESP8266, which in this article you will learn.
Why MicroPython for NodeMCU?
Python is one of the most widely used, and easy to learn programming languages to date. So, with the introduction of MicroPython, programming hardware-based microcontrollers got very easy. If you have never programmed a microcontroller before and want to start learning to program, MicroPython is a good start.
MicroPython uses a stripped-down version of Python standard libraries, so all of the standard libraries are not available. But, MicroPython does include simple and easy to use modules to interface with the hardware which means with the help of MicroPython, reading and writing to a GPIO register just got way easier.
The ultimate objective of MicroPython is to make programming microcontrollers as simple as possible, so, it can be used by anyone. With MicroPython importing libraries and writing code becomes easy, the code shown below is a simple example that blinks the onboard LED of the NodeMCU board, we will discuss the code in detail after the article.
from machine import Pin
from time import sleep
LED = Pin(2, Pin.OUT)
while True:
  LED.value(not LED.value())
  sleep(0.5)
What is an ESP8266 (NodeMCU)?
The ESP8266 is a low-cost Wi-Fi module, designed for Internet of Things (IoT) related applications.
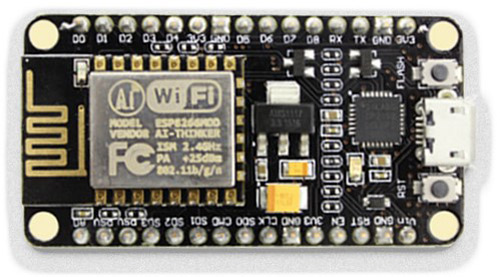
It comes with general-purpose input and output pins (GPIOs) and it also supports a variety of commonly used protocols like SPI, I2C, UART, and more. But, the coolest feature of this microcontroller is that it has built-in Wi-Fi. With it, we can connect to any 2.4GHz Wi-Fi very easily.
Now the basics are out of the way we can move onto the practical part where we will show you the required hardware, and the process of installing MicroPython on the ESP8266 IC.
Hardware Used
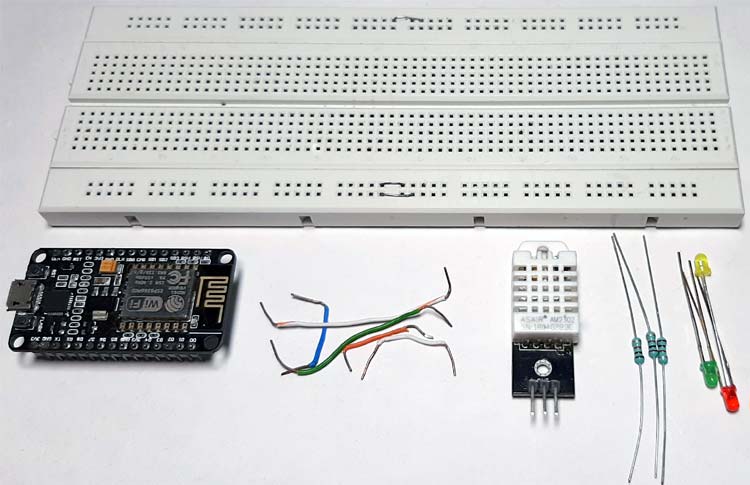
List of Materials Used
- 1 x Breadboard
- 1 x ESP8266 (NodeMCU)
- 1 x DHT22 (Temperature & Humidity Sensor)
- 1 x 3mm LED (Light Emitting Diode)
- 1 x 1K Resistor
- 5 x Jumper Wire
Installing the MicroPython Firmware for ESP8266
There exist two ways to install the MicroPython firmware onto the ESP8266 in this article. We will talk about both of them, but first, we need to download it.
Downloading the MicroPython Firmware for ESP8266:

Before we connect the NodeMCU (ESP8266) board to our PC, we need to download the latest version of MicroPython after that we can install the firmware on the NodeMCU, you can download it from the official Micropython download page
Installing the MicroPython Firmware on ESP8266:
Before we can install the firmware onto the ESP8266, we need to make sure we have the right drive for the USB to Serial Converter, most of the NodeMCU board uses a CP2102 USB to UART converter IC which is why we need to download and install the driver for the CP2102 USB to UART converter, Once the drive is downloaded and installed, we need to download the esptool, which is a python based tool made to read and write the firmware on ESP8266.
The easiest way to get Python is via the Microsoft Store, from there you need to download and install a copy of Python. Once Python is installed, we can use the pip3 install esptool command to install the esptool. The process will look like something like the below image.

Once installed, check to see if you access esptool from the command terminal.
To do so, just run the command, esptool.py version if you get a window like an image below, you have successfully installed esptool on your Windows PC.

And if you are having trouble accessing esptool from the command window, try adding the full installation path to the windows environment variable.
Finding the PORT Allocated for the NodeMCU Board:
Now we need to find out the allocated port for the NodeMCU board, to do that just go into your device manager window and look for an option called Ports if you expand that you can find out the port associated with the NodeMCU board. To us, it looks like the image shown below.

Erasing the Flash Memory of the ESP8266:
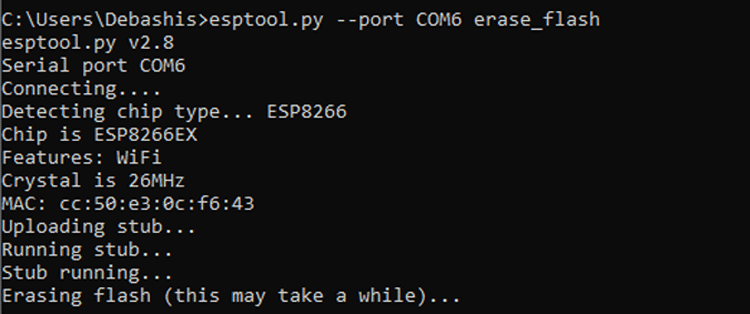
Now we have figured out the associate COM port, we can prepare the NodeMCU module by erasing the flash memory of it. To do so, the following command is used, esptool.py --port COM6 erase_flash. The process will look something like the image below.
Installing the Firmware:
Running the following command will install the MicroPython binary onto the NodeMCU board, once installed this binary will allow us to upload our python programs and communicate with the Read Evaluate and Print loop.
esptool.py --port COM6 --baud 460800 write_flash --flash_size=detect 0 esp8266-20200911-v1.13.bin
The process will look alike the image below,
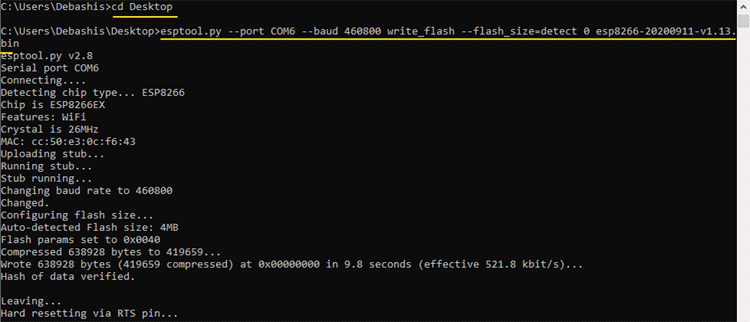
Please note that at the time of the installation, the binary was on my desktop so I have a cd to my Desktop and run the command.
Now that's done, its time to communicate with the board and blink some LEDs.
Communicating with the NodeMCU with PuTTY
Now let's start our first Hello World program by using PuTTY, PuTTY to do so we need to set the connection type as Serial, next we set the Serial line (In our case its COM6), and finally, we set the Speed to 115200 baud.
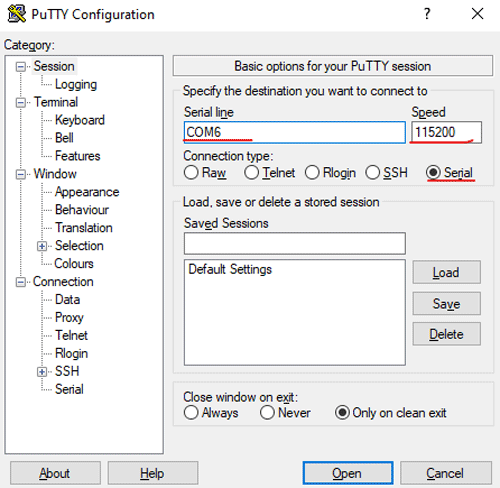
If everything is done correctly a window similar to the below image will appear, and we can easily write our code into it, it usually works like an iPython terminal. Also, we have run our first hello world program which is just two simple lines, and once we have put our print statement, we got our response.

Uploading a Python Based LED Blink Code using Ampy
Accessing MicroPython with the help of the PuTTY terminal is a good way to communicate with the ESP module, but another easy way is to upload the code is via the Adafruit Ampy tool, to install ampy, we can just run a simple pip3 install adafruit-ampy command and it will install ampy on our PC. The process will look something like the image below.

Now once you have this, we still need our information about the serial port which we are connected to. In our case, it is COM6. Now we just need to write our LED Blink code with MicroPython, for that, we have used the guide provided in the official micro python website
With the help of the guide, the following code is made.
from machine import Pin
from time import sleep
LED = Pin(2, Pin.OUT)
while True:
  LED.value(not LED.value())
  sleep(0.5)
The code is very simple. First, we import the Pin library from the machine. Pin class. Next, we need to import the time library, which is used to make a delay function. Next, we set Pin2 (which is the onboard LED attached to the ESP12E module) as output. Next, we set up a while loop where we turn on and off the LED with a 500ms delay.
That's how you upload the code onto NodeMCU. To do that, you need to run the following ampy command,
ampy --port COM6 put main.py
If the program gets executed corrected, you will see an LED blinking like shown below.
Note: While uploading the code, I set my current prompt location to my Desktop, so I did not need to specify a full path for the main.py file if that is not the case for you need to specify the full path for your main.py file.
Next, we move on to getting our temperature and humidity data from the DHT22 Sensor.
MicroPython on ESP8266: Getting Temperature and Humidity with DHT22
Schematic for interfacing DHT22 with NodeMCU:
The complete circuit diagram for this project can be found below. I have used fritzing to create this circuit.

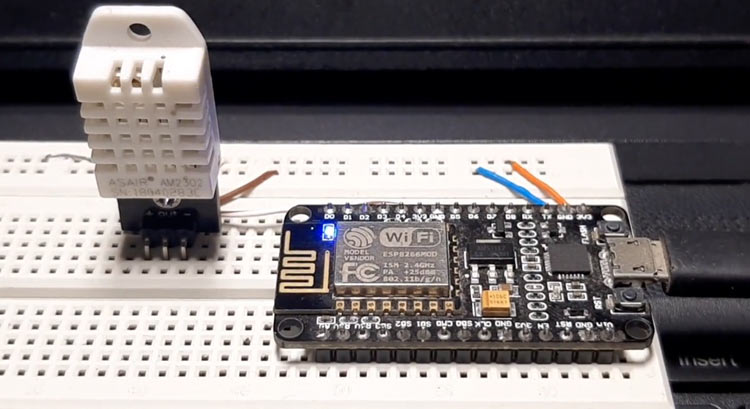
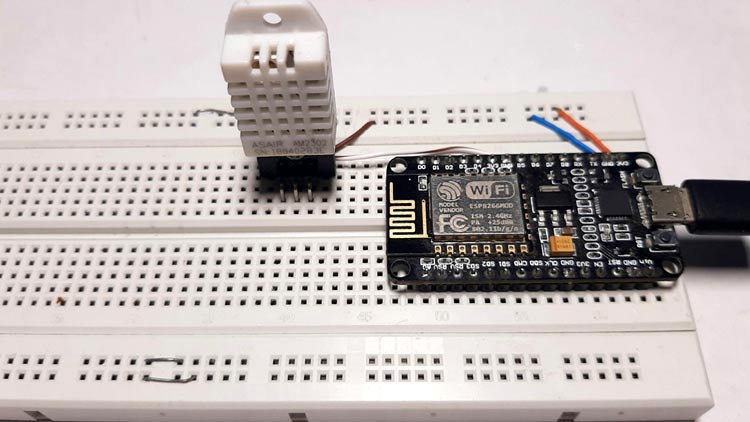
As you can see the circuit is very simple and can be easily built on a breadboard using jumper wires. The complete circuit can be powered using the micro-USB port on NodeMCU. My hardware set-up is shown below.
Code:
It's very easy to get the temperature and humidity data from a DHT22 or DHT11 sensor using a MicroPython because the MicroPython firmware we installed earlier comes with a built-in DHT library.
1. We start our code by importing the DHT library and the pin library from the machine class.
import dht
from machine import Pin
2. Next, we create a DHT object which refers to the pin, in which we attached our sensor.
sensor = dht.DHT22(Pin(14))
3. Finally, to measure the sensor value, we have to use the following three commands.
sensor.measure()
sensor.temperature()
sensor.humidity()
For the final code, we put it in a while loop with and print the values which mark the end of our code. Also, the DHT22 sensor needs 2 seconds before it can read any data so we need to add a delay of 2 seconds.
from machine import Pin
from time import sleep
import dht
dht22 = dht.DHT22(Pin(14))
while True:
  try:
    sleep(2)
    dht22.measure()
    temp = dht22.temperature()
    hum = dht22.humidity()
    print('Temperature: %3.2f C' %temp)
    print('Humidity: %3.2f %%' %hum)
  except OSError as e:
    print('Failed to read data from the DHT22 sensor.')
Once we are done coding, we can upload the code with the help of the ampy command.
ampy --port COM6 put main.py
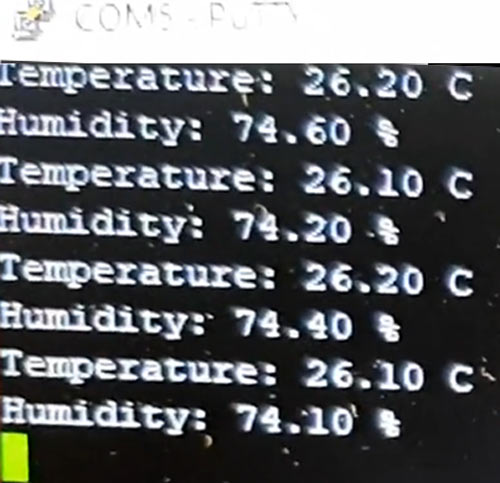
After executing the code successfully, you can monitor the temperature and humidity values on any serial monitor. I have used putty and as you can see below, I was able to receive temperature and humidity values on COM5.
Hope you enjoyed the article and learned something useful. If you have any questions, you can leave them in the comment section below or use our forums to post other technical questions.
Complete Project Code
#LED Blinking on ESP8266 using Micropython:
from machine import Pin
from time import sleep
LED = Pin(2, Pin.OUT)
while True:
  LED.value(not LED.value())
  sleep(0.5)
#Interfacing DHT22 with ESP2866 using MicroPython:
from machine import Pin
from time import sleep
import dht
dht22 = dht.DHT22(Pin(14))
while True:
  try:
    sleep(2)
    dht22.measure()
    temp = dht22.temperature()
    hum = dht22.humidity()
    print('Temperature: %3.2f C' %temp)
    print('Humidity: %3.2f %%' %hum)
  except OSError as e:
    print('Failed to read data from the DHT22 sensor.')
