We all know about accelerometer and gyroscope, they are primarily used to detect acceleration. While Accelerometer can measure linear acceleration, the gyroscope can help find the rotational acceleration. A gyroscope is used to measure angular velocity that uses the earth’s gravity to determine the orientation of the object in motion. There is a sensor like MPU6050 which has both accelerometer and gyroscope and it works as an Inertial Measurement Unit (IMU) to find the orientation, position, and velocity.
Here we are discussing about ADXL345 Accelerometer which is used to measure the acceleration or change in velocity in x, y, and z-axis. These small sensors are used in cars and bikes to detect accidents to deploy the airbags and are also used in mobile phones for a variety of applications like compass and location tracking.
We used the accelerometer to build various useful applications which you can check at below links:
- Vehicle Accident Alert System
- Hand Gesture Controlled Robot using Arduino
- Earthquake Detector Alarm
- Ping Pong Game
You can see all the accelerometer-based projects here.
Types of Accelerometer Sensors
There are many types of MEMS accelerometer sensors available in the market. They can be classified on the basis of precision, power consumption, and interfacing. All these sensors are portable and can be fitted in any kind of device like wearables. These sensors measure acceleration in 3-axis (x,y,z).
Some widely used Sensors are:
- ADXL335
- ADXL345
- ADXL356

These accelerometer sensors are very popular and apart from these three, there are many other accelerometer sensors like ADXL354, ADXL355, ADXL372, etc.
Let’s see the difference between these sensors.
Comparison: ADXL335 vs ADXL345 vs ADXL356
| ADXL356 | ADXL345 | ADXL335 | |
| Range | ±10g to ±40g | ±16g | ±3g, small range with precise readings |
| Interface | Analog | SPI, I2C | Analog |
| Power Consumption | Low Typical: 150µ |
Low Typical: 140µ |
Standard Typical: 350µ |
| Pricing | High | Low | Lowest |
Among the above three, ADXL345 is easy to interface because of its digital nature. But its programming is difficult as it works on the SPI/I2C protocol. ADXL345 can measure static and dynamic accelerations and suitable for mobile applications. Also, these sensors are laboratory calibrated and don’t require any further calibrations.
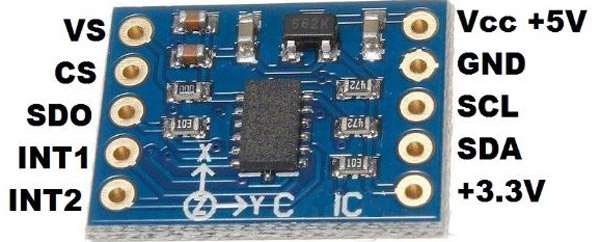
Here we will use the Adafruit library for the ADXL345 sensor to interface it with Arduino Uno.
Components Required
- Arduino UNO
- ADXL345 Accelerometer
- Male-female wires
- Breadboard
Circuit Diagram
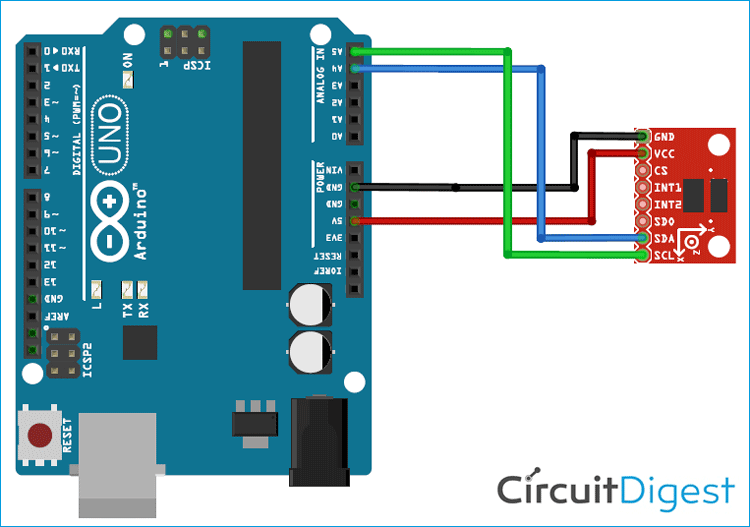
Circuit diagram for ADXL345 accelerometer interface with Arduino is given below:
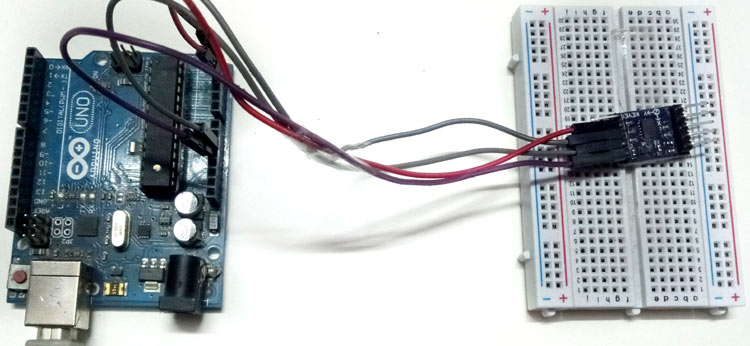
ADXL345 Arduino Connections:
- Connect A4 pin (SDA) of Arduino -> SDA pin of adxl345
- Connect A5 pin (SCL) of Arduino -> SCL pin of adxl345
- Connect GND of Arduino -> GND pin of adxl345
- Connect 5V of Arduino -> Vcc of adxl345
ADXL345 Arduino Code Explanation
For this ADXL345 Arduino project, we need two libraries for the ADXL345 Sensor.
- Adafruit ADXL345
- Adafruit Unified sensor
To download the above libraries, open Arduino IDE and go to Sketch -> Include Library -> Manage Libraries. Search for Adafruit ADXL345 and install it. Similarly, search for Adafruit Unified sensor and install.


Now, we are ready to write the code. Example code can be found in Files -> Example -> Adafruit ADXL345 -> sensortest
1. First, include all the required libraries header files to support the functionality of the sensor. Here we are also using wire library for I2C communication.
#include <Wire.h>
#include <Adafruit_Sensor.h>
#include <Adafruit_ADXL345_U.h>
2. Make an instance by using any variable like accel to use the various functions of the ADXL345 Arduino library.
Adafruit_ADXL345_Unified accel = Adafruit_ADXL345_Unified();
3. In void setup() function, initialize serial communication to print data on a serial monitor using Serial.begin() function. Now, check whether the valid ADXL sensor is connected or not. We will check the result returned by accel.begin() function if it returns false then print a message that no valid sensor found.
   void setup()
{
   Serial.begin(9600);
   if(!accel.begin())
   {
      Serial.println("No valid sensor found");
      while(1);
   }
}
4. In void loop() function, create a variable to use sensors_event_t structure. Use this variable (in this case “event”) to fill the structure members using .getevent() function. Now, print the values of acceleration in x,y, z-axis using event.acceleration.x() function.
void loop()
{
sensors_event_t event;
accel.getEvent(&event);
Serial.print("X: "); Serial.print(event.acceleration.x); Serial.print("");
Serial.print("Y: "); Serial.print(event.acceleration.y); Serial.print("");
Serial.print("Z: "); Serial.print(event.acceleration.z); Serial.print("");
Serial.println("m/s^2 ");
delay(500);
}
Complete code with a Demonstration video is given at the end of this article.
Testing ADXL345 accelerometer Arduino Interfacing
Finally, connect the ADXL345 sensor with Arduino UNO properly and upload the code in the Arduino Uno board. Then open Serial monitor and you will see acceleration readings in x, y, z-axis as shown below.
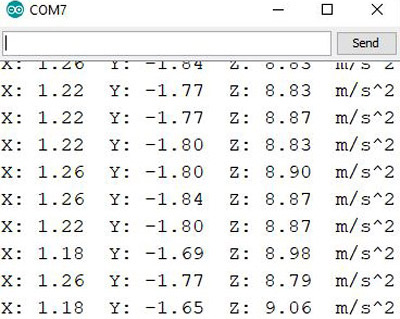
Try to move the sensor slowly in all the directions and observe the readings.
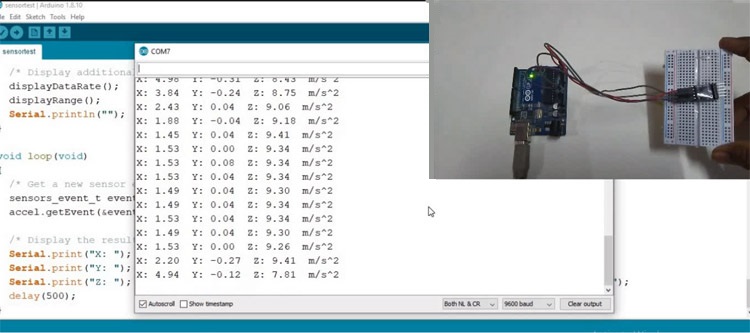
So this is how an Accelerometer can be used with Arduino UNO to detect the variations in x, y, and z-axis.
Complete ADXL345 Arduino Code with a video that is given below.
Complete Project Code
#include <Wire.h>
#include <Adafruit_Sensor.h>
#include <Adafruit_ADXL345_U.h>
Adafruit_ADXL345_Unified accel = Adafruit_ADXL345_Unified();
void setup(void)
{
   Serial.begin(9600);
   if(!accel.begin())
   {
      Serial.println("No valid sensor found");
      while(1);
   }
}
void loop(void)
{
   sensors_event_t event;
   accel.getEvent(&event);
   Serial.print("X: "); Serial.print(event.acceleration.x); Serial.print("  ");
   Serial.print("Y: "); Serial.print(event.acceleration.y); Serial.print("  ");
   Serial.print("Z: "); Serial.print(event.acceleration.z); Serial.print("  ");
   Serial.println("m/s^2 ");
   delay(500);
}

