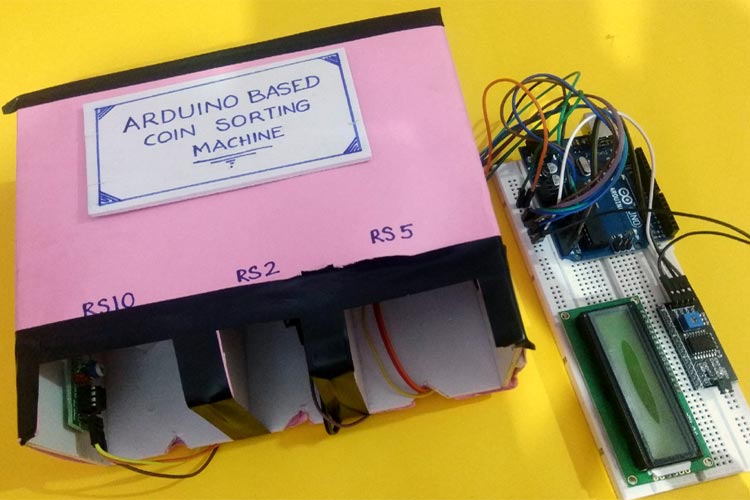
We previously built an Arduino based paper currency counting machine using a color sensor. Now in this project we are building an Arduino counting machine using IR sensors. This machine counts and sorts the coins in different sections with the help of an Infrared sensor. Here, an arrangement is made where IR sensors are placed to sense different coins, and Arduino UNO is used for processing the data and showing the total count value on 16x2 LCD.
Required Components
- Arduino UNO
- IR sensor
- Breadboard
- 16*2 Alphanumeric LCD
- I2C Module for 16x2 (1602) Alphanumeric LCD
- Connecting Wires
Making Structure for Arduino Coin Sorter
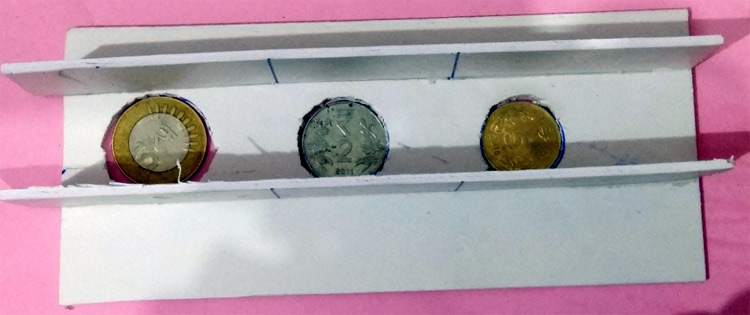
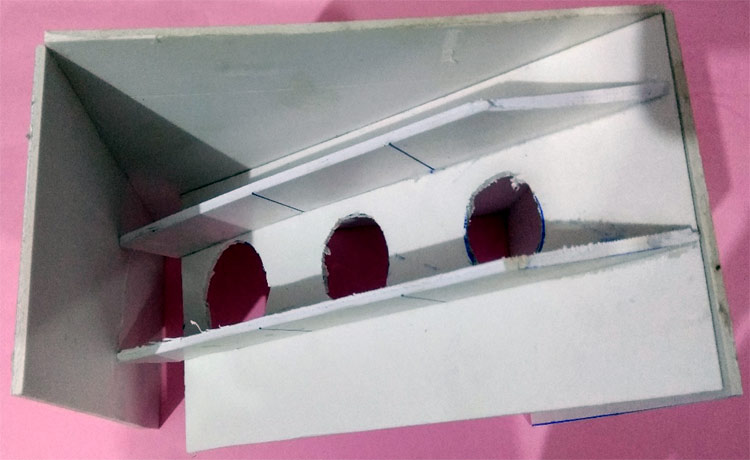
Step 1: Take a cardboard sheet and mark for different coin sizes as shown in the below figure. Then carefully cut the marked portions. Cutting of these portions must be done accurately; otherwise, the project may not work perfectly.
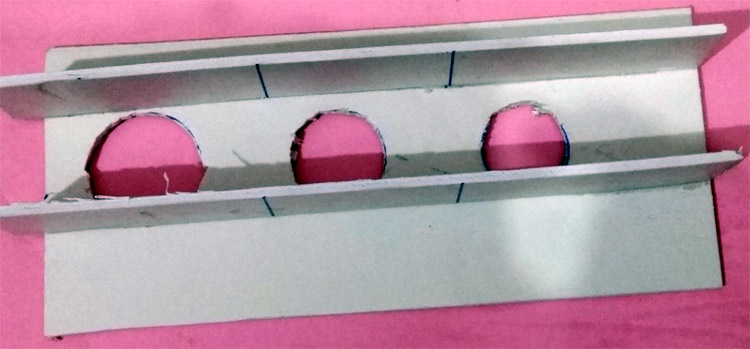
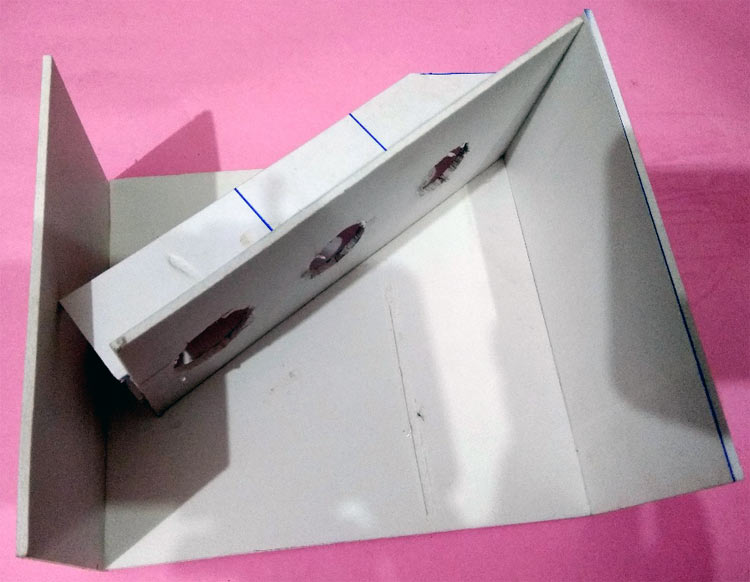
Step 2: Place the above arrangement in a slope structure as per the image shown below. After making the arrangement, check it by inserting different coins on the slope to ensure that the arrangement is perfectly working. If the coin is not inserting properly, then slightly increase the size of the hole according to coin and recheck until successful operation.
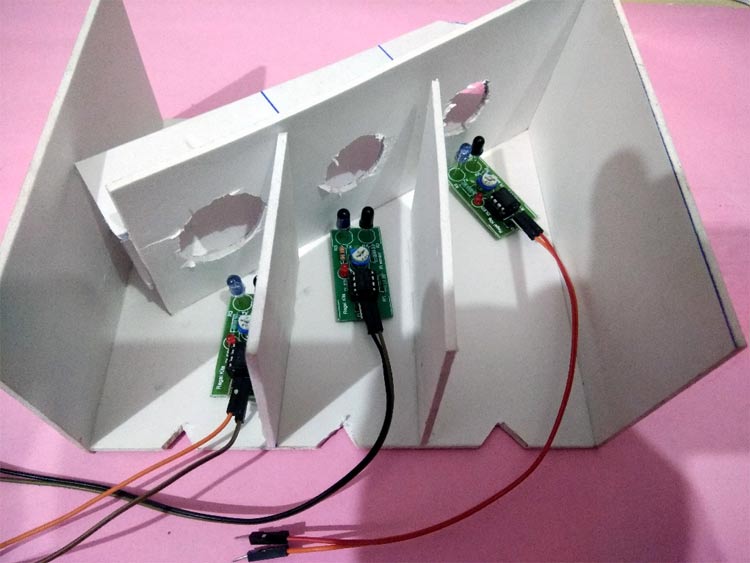
Step 3: Place the IR sensors near the output path of individual coins. It is very important to correctly place the sensors and calibrate them using their potentiometer. Then again insert the coins to check the sensor operation. Learn more about the IR sensor circuit here.
Circuit Diagram
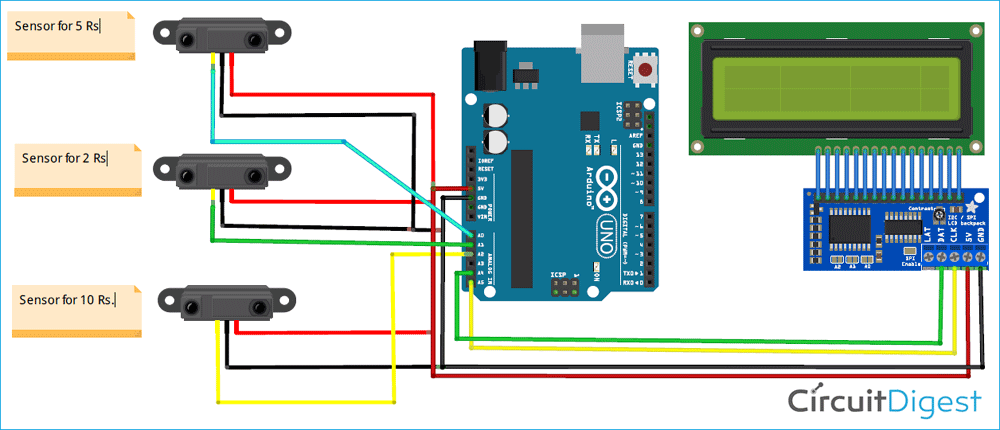
Below is the Circuit diagram for Arduino counting machine:
Here, IR sensors are placed at different output paths of the coin sorting machine to sense the coins. When a coin is inserted into this Arduino coin counter, it enters the dedicated path as per the mechanical design and the respective IR sensor senses the coin and gives HIGH output value to the Arduino which can be read by the analog pins of Arduino. The IR sensor which is giving HIGH value, decides the coin value like Rupees 2/5/10.
Here a 16x2 Alphanumeric LCD is interfaced with Arduino using an I2C module, to display the number of coins inserted into the box. This LCD can also be connected to Arduino directly without using the I2C module, but this requires more number of connections. So to make it simpler, an I2C module is used along with LCD, which only uses 2 pins, i.e. SCL, SDA for connecting LCD with Arduino. For powering the Arduino, a 12VDC, 1 AMP AC-DC adapter is used, which can be directly connected to the power jack of Arduino.
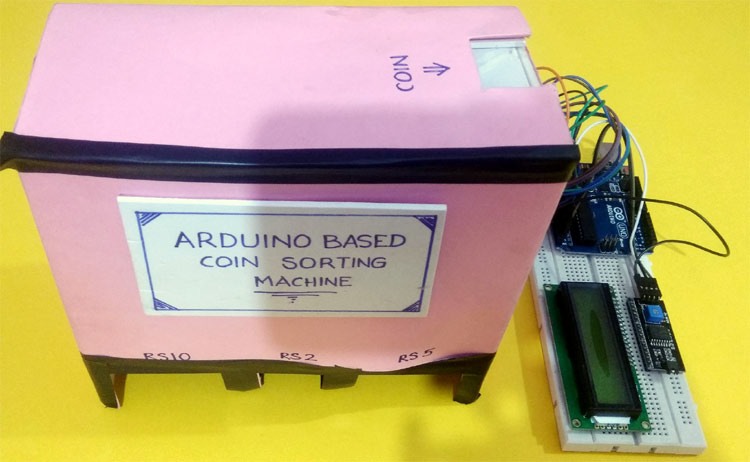
After a little touch-up, the complete setup for Arduino Based Coin Sorter will look like below:
Programming the Arduino
After successful hardware connections, now it’s time to program the Arduino. The complete code for Arduino is given at the bottom part of this tutorial. The stepwise explanation of the code is given below:
The first thing to do in the program is to include all the required libraries. Here in my case, I have included “LiquidCrystal_I2C.h” library for using the I2C interface of an LCD and “Wire.h” for using I2C functionality on Arduino.
#include <Wire.h>
#include <LiquidCrystal_I2C.h>
LiquidCrystal_I2C lcd(0x27,16,2);
Inside setup (), LCD commands are written for displaying a welcome message on LCD.
lcd.init();
lcd.backlight();
lcd.setCursor(0,0);
lcd.print("  ARDUINO BASED       ");
lcd.setCursor(0,1);
lcd.print("  COIN SORTING       ");
delay(2000);
lcd.clear();
Inside loop(), analogRead function is used to read the Infrared sensor values, from different Analog channels of Arduino and store them in different variables.
int s1=analogRead(A0);
int s2=analogRead(A1);
int s3=analogRead(A2);
Then, the code below is written to sense the Coins and increment the coin counter values. Here a flag value f1 is used to avoid multiple counts of the coins.
if(s1>=200 && f1==0)
{
  f1=1;
}
else if(s1<200 && f1==1)
{
  f1=0;
  c1++;
}
Finally, the count values are displayed on LCD, using the commands below.
lcd.setCursor(0,0);
lcd.print("RS10   RS2   RS5");
lcd.setCursor(1,1);
lcd.print(c1);
lcd.setCursor(7,1);
lcd.print(c2);
lcd.setCursor(14,1);
lcd.print(c3);
Operation of Arduino Coin Counter
After the complete setup and uploading the code, switch ON the 12V DC power supply. First, a welcome message will be displayed on the LCD and after a few seconds, a screen with the number of all the available coins will be displayed on LCD. In the beginning, it will show zero as we haven’t inserted any coins yet.
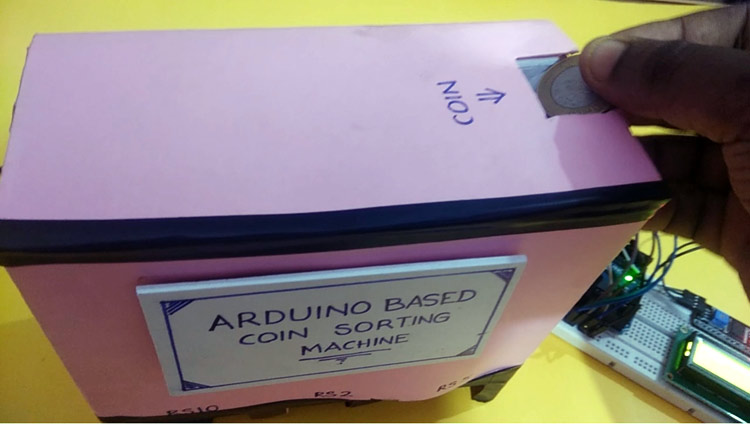
Next, insert any coin (Rs. 2/5/10) at the top of the machine where “Insert Coin” is written. Now you will see the value of the coin count must be updated on LCD. Then Insert multiple coins of different values and check the count of the respective coins on LCD.
Complete code along with a Video is given below.
Complete Project Code
#include <Wire.h>
#include <LiquidCrystal_I2C.h>
LiquidCrystal_I2C lcd(0x27,16,2);
int f1=0,f2=0,f3=0;
int c1=0,c2=0,c3=0;
void setup()
{
lcd.init();
lcd.backlight();
lcd.setCursor(0,0);
lcd.print("  ARDUINO BASED       ");
lcd.setCursor(0,1);
lcd.print("  COIN SORTING       ");
delay(2000);
lcd.clear();
}
void loop()
{
int s1=analogRead(A0);
int s2=analogRead(A1);
int s3=analogRead(A2);
 lcd.setCursor(0,0);
 lcd.print("RS10   RS2   RS5");
if(s1>=200 && f1==0)
{
  f1=1;
}
else if(s1<200 && f1==1)
{
  f1=0;
  c1++;
}
if(s2>=200 && f2==0)
{
  f2=1;
}
else if(s2<200 && f2==1)
{
  f2=0;
  c2++;
}
if(s3>=200 && f3==0)
{
  f3=1;
}
else if(s3<200 && f3==1)
{
  f3=0;
  c3++;
}
lcd.setCursor(1,1);
lcd.print(c1);
lcd.setCursor(7,1);
lcd.print(c2);
lcd.setCursor(14,1);
lcd.print(c3);
}
Comments
I'm just wondering, why does
I'm just wondering, why does you s1, s2 and s3 values be reading greater than and/or less than 200? Also, what is the purpose of the flags and counts ann what is their relationship?
I'm just wondering, why does
I'm just wondering, why does you s1, s2 and s3 values be reading greater than and/or less than 200? Also, what is the purpose of the flags and counts ann what is their relationship?



where can i stimulate online this cicuit please reply apas